Aug 20, 2009 here I will show you how to scan image before restoring it in mac os x. How to Install Snow Leopard DMG from a Flash Drive Mac Only - Duration: 2:29. Chris Appleton 284,433 views. Aug 20, 2009 here I will show you how to scan image before restoring it in mac os x. How to Install Snow Leopard DMG from a Flash Drive Mac Only - Duration: 2:29. Chris Appleton 284,433 views. AutoDMG 1.3b220 doesn't finish ASR finalize step (log below) Built on iMac 13,2 10.9.2C64 Occurred both on CLI and GUI (image completes but haven't tested imaging w/ it) Starting phase: Finalizing disk image phase: Finalizing disk image. There is a software namely DMG viewer that open Mac.dmg in windows and view all the Disk Image files on windows operating system. The application is designed in such a way that it only needs DMG files to view the data by following mentioned steps.
- How To Imagescan A Dmg Download
- How To Imagescan A Dmg Drive
- Images And Graphs
- How To Imagescan A Dmg In Mac
- Images And Gallbladder Anatomy
- How To Imagescan A Dmg In Windows
Computer viruses hold a sweet spot between boring, everyday occurrences, dating back to the 70s, and dramatic, science fiction fueled monsters that will haunt us in our new information-driven world.
The bad news here is that once you try to delete Basesystem.dmg, the Mac asks to enter the password and identify as an administrator. These may be of all tpes, but the main one is spyware and virus actions. The e-mails may also be cleverly designed to imitate legitimate messages coming from big companies, like PayPal, eBay and others.In addition to via e-mail, the Basesystem.dmg may come as a result of an installation of an app you may have downloaded from a suspicious third-party site. 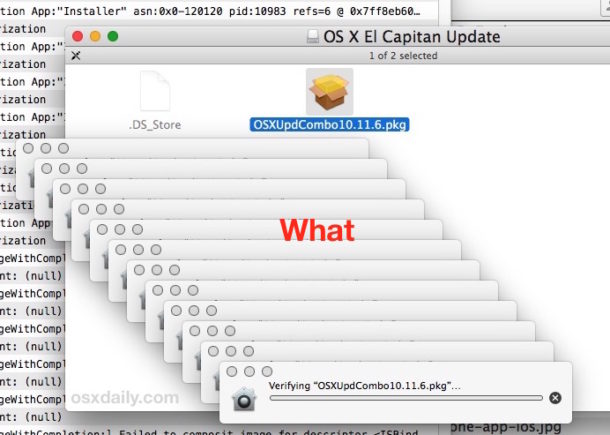 These types of programs may appear as useful and free, but once they are installed, they are very hard to remove and their general purpose is to show advertisements and run suspicious processes, like Basesystem.dmg.Basesystem.dmg – More InformationOnce the Basesystem.dmg file is ran on your Mac, it may begin performing different malicious activities.
One may ask, “Do you need antivirus to protect your Mac?” The reality is, all computers, even Macs, are vulnerable to malware (short for malicious software). While Apple takes a lot of security precautions, how secure your Mac is depends on your knowledge of how to check for viruses and how to remove them.
Whether you want to know how to remove virus from MacBook Pro, MacBook Air, or iMac, learning to keep your information safe first is necessary and easy, with a few tips from the professionals.
Get Setapp to protect Mac from malware
Your computer deserves to be healthy. Download Setapp, an apps toolkit that covers reliable protection methods against any kind of malware.
How to scan your Mac for a virus
Why checking your Mac for viruses is important? If a computer virus was the only thing to watch out for, this world would be a simpler place. Malware, adware, spyware, malicious files, worms, trojans, phishing software, you name it, you should check for it. The old way of thinking was that because there are more PCs than Macs in the world, the “virus people” would focus on them instead of Macs. But, we’re not in the 2000s anymore. In fact, in 2018, Apple moved to the fourth position in global laptop shipments. This means, Macs are no longer shiny white boxes that are meant for fun and entertainment.

Not only do we run our businesses off Apple devices and different versions of macOS but we also store family photographs, send out sensitive info — and, thanks to cloud computing, each device is synchronized. Unfortunately, this means your Mac could be a far juicier target than the PC sitting in some corner cubicle.
Know what a Mac virus is
Most of us are familiar with recognizing what a virus looks like thanks to its atrocious design and alarming vocabulary. However, not all viruses take the shock-and-scare approach to getting on your Mac. The latest adware could look like an Adobe Flash Player installer, but is, of course, fake. Not only does it trick you into thinking it's something as normal as Flash, but the installed adware then pretends to be a virus scanner. It shows you bogus problems and encourages you to fix them by giving over sensitive information.
Other forms of viruses could look like Microsoft Office files (e.g. Excel sheets, Word documents), Adobe Photoshop add-ons, as well as music and movie files that you get from BitTorrent or other file sharing programs. But the most common file format that a virus takes is a .dmg file, because it was created by Apple itself to help install good software on your computer. Your task in securing your Mac is to look out for .dmg files showing up when you’re trying to install something. If you’re ever trying to download something you know is supposed to be an image, music, movie, or document, but you get a .dmg file instead — that is as red as a red flag gets in terms of viruses. Do yourself a favor and delete that file immediately.
Keep Mac virus sources in mind
When it comes to having your Mac infected by a virus, we probably expect the attack to come from a stranger. Truth be told, a lot of viruses come from our friends, family, and colleagues, who unfortunately became the primary victim and are now unintentionally passing their viruses to you.
A popular malware virus of 2017 was embedded into a Word document — a Mac Word file, not a PC one. In 2018, Apple discovered flaws in their Intel processor chips that could lead to two kinds of very ambitious strains of Mac viruses too. It’s wild to think that even iPads and iPhones can contract malware.
How to check for malware
In an ideal world, scanning for viruses and the other methods for malware removal should be automatic and happen nearly continuously. In reality, you can consider yourself reasonably safe if you scan your Mac close to once a week. Fortunately, there are quite a few ways to make sure you are as protected as possible.
A good start to scan your Mac for viruses is to see whether you have applications installed that you don’t recognize:
- Go to the Applications folder via Go > Applications in Finder or using the shortcut Shift + Command + A.
- Scroll through the list and delete any unknown applications.
- Then empty the trash.
The second step you should do is check for browser hijackers and adware extensions:
- Go to Safari > Preferences. See what the Homepage URL is currently set to and correct if needed.
- Then proceed to the Extensions tab and uninstall any you don’t recognize, as they could spy on you, save your private data, and redirect you to their malicious websites.
How to run a Mac virus scanner and stop viruses from stealing your information
It’s a common misconception that viruses only happen to people who are gullible, ignorant, or technologically illiterate. The stigma is that hackers prey on people, when in reality, they prey on behavior.
Our basic assumption with Macs is that we expect Apple and our applications to have done all the security work for us. In truth, every user has to adjust their own behavior when using their Mac.
Do you use public WiFi? Consider getting a Virtual Private Network (VPN) to encrypt the connection between your laptop and the external network. Shimo is a great VPN manager app that will help you here. While using it, raw information (whether sensitive or not) can’t be fed to any malicious programs lurking on your Mac, and hackers on the same network won’t be able to decode anything you’re working on.
Speaking of encryption, Macs using OS X Lion or later come with the option to encrypt their hard drives using FileVault 2. Although encryption won’t prevent viruses from entering your computer (for that, you’ll need a scanner), it would still be very helpful in stopping viruses from stealing your information. To turn on FileVault:
- Go to System Preferences
- Select Security & Privacy
- Navigate to the FileVault tab
- Choose Turn On FileVault
How To Imagescan A Dmg Download
Keep your Mac secure and virus-free
Trademark signs of something being wrong with your Mac: slow processing memory, a bloated disk space, intense CPU usage, and network speed lag. Unfortunately, viruses don’t live in an easy-to-find location like your computer’s desktop. They can be embedded within an application, most notably, your favorite web browser, where it’s easier for them to view what you’re viewing and track what you’re typing. If you kept on seeing weird websites taking over your search bar, it's a sign that your browser has been hijacked. Other applications can get corrupted or infected too, especially if they have particularly weak security systems. Iratus doing dmg to own team store. Another example could be an email app you use or an open-source application that is behind on their patch upgrades.
If you think one of your applications is infected, a typical knee-jerk reaction would be to delete the whole thing and redownload it. Often, this will do the trick, but there are simpler solutions available. Clearing the application's cache should always be your first step, and, if there are optional hidden files, consider removing them as well.
Scan your Mac for viruses with CMM X
Run an instant malware scan to identify and remove suspicious files from your Mac. There’s no tool that can do it better than CleanMyMac X.
To remove any application’s cache and get rid of Mac malware from the Library folder:
- Use the shortcut Shift + Command + G to Go to Folder
- Type ~/Library/Caches and choose Go
- Delete any particular files inside the folder
How To Imagescan A Dmg Drive
If you are unsure about deleting cache files manually, use an app like CleanMyMac X:
- Launch CleanMyMac
- Go to System Junk and click Scan
- When the scan is complete, choose Review Details
- Select User Cache Files and pick the caches you’d like to delete
- Click Clean
In addition, CleanMyMac now features a Malware Removal function, using which should become your weekly habit.
- In CleanMyMac, choose the Malware Removal tab
- Click Scan
- Follow the instructions given. Hopefully it should say your Mac is clean most of the time.
Unfortunately, not all viruses are easy-to-understand files that just sit on your computer. Sometimes they are root certificates that intercept your passwords and messages, and send a copy to hackers. To effectively secure yourself from this, only download apps with valid developer certificates. Which ones are those? It’s hard to know but Apple built a feature that could help you here.
- Go to System Preferences
- Select Security & Privacy
- In the Allow apps downloaded from: select App Store and identified developers
You are well on your way to being protected from malware now. But, the truth is, simply avoiding viruses is not enough. You need to be proactive — it’s time to get a virus scanner.
Check viruses like a pro
If you want complete Mac security, there is no better tool than CleanMyMac X, which can effortlessly scan for all the latest viruses, malware, spyware, and more. Just launch the app on the regular basis and click the Smart Scan option to inspect your Mac for any suspicious activity, besides other suggested features for optimization and cleaning out old files.
Remove viruses from Mac completely
Using a tool like CleanMyMac makes getting rid of viruses, of all shapes and formats, very easy. After the scan, it tells you what it’s found and gives you the option to remove it completely right then and there. Additionally, it will give you all kinds of other great options on how to optimize your Mac’s performance.
As mentioned above, hackers who want to steal your information don’t target you specifically, they target your behavior. So, with this in mind, change your behavior when it comes to using your Mac in potentially unsafe ways. Recognize that viruses come and go, all the time, and across many different file formats. If you get a virus, you’re not ruined.
Arm your computer with encryption tools (like FileVault and a VPN), so that your information can’t be stolen. Practice a healthy dose of skepticism when downloading files. But, most importantly, get professional apps that bring you the most results, like CleanMyMac or Shimo — all of which are available on Setapp for your to try free. So get a scan now and see what it says.
Run Apple Software Restore from the command line | 7 comments | Create New Account
| Click here to return to the 'Run Apple Software Restore from the command line' hint |
The following comments are owned by whoever posted them. This site is not responsible for what they say.
I still have not been able to get the hdiutil command to convert a read/write disk image into a read-only or compressed image, and have the resulting image mount! Since you need a read-only or compressed image for 'asr' to do its magical checksumming, I am stuck.
I have tried running hdiutil from the command line and running Disk Copy and doing the conversion there. All result in an error 'no mountable volumes'!
Until I get past that, I am unable to use 'asr' from the command line, as 'asr' tries to mount the compressed image after computing its checksums.
I have tried running hdiutil from the command line and running Disk Copy and doing the conversion there. All result in an error 'no mountable volumes'!
Until I get past that, I am unable to use 'asr' from the command line, as 'asr' tries to mount the compressed image after computing its checksums.
Thanks for the pointer on ASR, that'll come in handy when I upgrade a lab of 60 iMacs to 10.2.X
As for invictus' problem:
A little while back I combined various hints and wrote a shell script that created a compressed disk image from a folder. I used something like this to convert the r/w image into a ro-compressed image:
hdiutil convert original.dmg -format UDZO -o compressed.dmg
I just tested this again with a a couple of small images (from 1-100MB) and it still seems to work in jaguar. Let me know if this works for you, I haven't tested with a full image of a system, so maybe there's an issue there.
Images And Graphs
I have prepared images and compressed them or converted them to read-only, mounting them successfully afterwards. Several different sizes, including a 2 gigabyte one that was almost completely full. No problems. It looks like it is just system images (perhaps the boot block info?) that have the problem. I decided to skip the conversion step and simply go from a disk partition to a compressed image and see what 'asr' could do with that. Here is the sequence I got with the latest one: There are several things going on, after some reading. A compressed image can still be mounted so that checksums can be computed for many of the files and folders. Once these are done, the image is 'unflattened', i.e., made multipart so that the checksums can be appended. Something seems to be going wrong with these steps.
Well, I think I have got it, but it will take a few more hours of testing to confirm. I wanted to let you know that I surmounted one of the hurdles.
Since 'asr' cannot seem to 'unflatten' the image, its image scanning function fails. So, I unflattened the image for it:
hdiutil unflatten macosx10.1.5a.dmg
sudo asr -imagescan macosx10.1.5a.dmg
It worked! (or at least, no error messages, which is really not the same thing at all) So, progress at least.
How To Imagescan A Dmg In Mac
When I try to use my iBook (OSX 10.2.1) Software Restore CD's on my G3 Firewire PowerBook I get the message '..this disc cannot be used on this model..'.
Any idea how to get around this?
After a lot of trial and error, mostly error, I got 'asr' to work. Any idea how to get around this?
There were two bugs/limitations in Apple software that I had to deal with, that clouded much of the issue.
- Disk Copy 10.2.2 supports disk images larger than 2 Gigabytes, essential to imaging a 10.2.2 release. However, when you create the disk image, you cannot use the sparseimage format. You must create a disk image of the appropriate size (perhaps 10% larger than the files you are going to copy to allow for the block size issue), and then do the copy.
- asr can only work on compressed or read-only disk images, that have been unflattened.
Images And Gallbladder Anatomy
What this means in practiceI originally tried to use Carbon Copy Cloner 2 to create the image from a prepared partition on the computer. However, CCC creates a sparseimage format image which led subsequently to all of my headaches in later stages. Once I figured out that creating the image beforehand was essential, everything started to work. You can still use CCC to do all of the useful stuff.
The final steps in the sequence are to unflatten the read-only image, do an image scan, and flatten the image again. After that, you can use asr to prepare all of your disks. Thus:
How To Imagescan A Dmg In Windows
I'm trying to maintain my sanity here. I've gone through all of the messages I can find on this but I'm still having issues with ASR. The really frustrating thing is that I'm not getting error messages, just the help screen from ASR. I'm sure that I'm using the correct syntax, I've tried it with flattened and unflattened, and compressed image files but it's the same resuly. I'd really like to benefit from the wisdom of the group - any insight as to what might be missing?
Thanks.
Thanks.
